

Above: Illustration by Krisdog/DepositPhotos.
If you’ve been forced to become a computer network engineer to keep the household running smoothly – so the children can go to school and the grownups can keep working – this is going to be useful to you.
If you are a tech guru – move along – this article is not for you. Go read an IEEE publication.
To many people Wi-Fi and the Internet are synonymous, but while they are related, they are different.
But they both must work together well so that you have the best possible online experience. That means web pages that load quickly, videos that play without buffering and online classes, and meetings that proceed with no dropouts.
If either your internet connection outside your house or your network inside your house have problems, you are going to suffer.
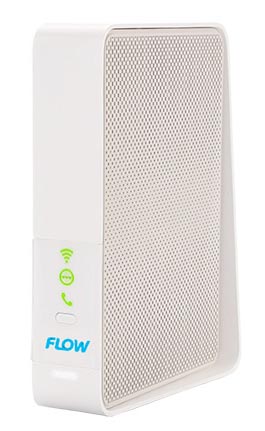
Your home Internet service provider, Flow, Digicel or Amplia, delivers your connection to your house, normally via a copper or fiber optic cable. That cable connects to a little device in the corner.
This box does many things. It gets a signal from your ISP, it routes data between your home network and the internet, if acts as a wireless access point that your devices can use to connect to the internet. And it acts as a firewall.
In the bad old days, you would end up with four or five pieces of equipment, but these have all been combined into one box. So, we can call it the modem/router/firewall/access point, but let’s just call it your Internet gateway.
It is through the gateway that all the Internet connects.
To get the internet from that gateway to every room of your house, you must build an in-home network. This network can be wired or wireless (normally WiFi, because it’s really convenient, nobody loves trailing wires around).
There are two ways to build an in-home network.
The first is to run wires from the gateway to each device that needs an internet connection. From a technical standpoint, this is the better way. You get a better signal, which leads to better speed, fewer dropouts, and less buffering.
If your devices are normally near to the gateway and have an ethernet port, you can plug them in for the best experience.
And if the devices are in use are all over the house, running cables is unsightly at best. A really careless wired cabling run can cause you to break your neck when you make that 2am, otherwise successfully sneaky refrigerator run.
On top of that, devices like phones, tablets and some laptops have no ports for a networking cable so you cannot use a wired connection.
So, we turn to wireless networking for our in-home network. For the most part, home wireless is called Wi-Fi. Wi-Fi systems can transmit data for short distances using radio waves.
And by short distances, we are taking 150 feet or less, usually much less. Every wall, concrete slab, or piece of structural steel cuts about 20 to 30 feet off that range.
Interference from other radio signals – microwaves, poorly shielded wiring, and other Wi-Fi signals – also cuts the range. By the time you add up all the ways the signal can be interrupted, it might travel just 40 to 50 feet, losing power all the way. That’s why you see three bars when you stand next to the gateway and one bar in your bedroom. Fewer bars usually means slower speeds as signal strength drops.

There are a few things you can do that run from simple and inexpensive to complex and expensive to improve WiFi coverage in your home.
Simple and inexpensive: Move your gateway.
Try to move your gateway to a central location in the house. This should help provide a good signal to every room, and a decent signal to the floor above if there is one. Depending on how your house is set up and how much excess cable the ISP installers left, this should be easy.
Try to set up the modem on a high shelf way from TVs, microwaves, and fluorescent lights. If the installers did not leave any excess cable you will have to call your ISP and ask them to send the installers back. They may charge you a few hundred for this. But if you threaten to switch, they might be willing to do it for a reduced fee.
If you are switching to a new ISP, make sure to make them install their gateway centrally. The installers may grumble but you must insist. They should place the device where you want it, not where is convenient for them.
Technical (here there be dragons) but inexpensive: change your channel.
Wi-Fi signals are broadcast on two frequencies and each frequency has multiple channels. The first is the 2.4 ghz frequency that has 11 channels numbered 1 to 11. The second is 5.0Ghz and that has umpteen channels.
On the 2.4 ghz frequency signals and data travel over longer distances but at slower speeds. 5Ghz signals are generally faster but cover much less ground. If you are close to an access point with a 5Ghz signal you should use it. If not, you will probably need to use the 2.4 Ghz frequency.
Unfortunately all the gateway access points in the area are probably broadcasting on 2.4 Ghz and perhaps interfering with each other. This is why you can see the names of your neighbors’ Wi-Fi networks.
The trick here is to find one of those 11 channels that few people around you are using. Ideally, you might be able to find a channel that no one can else is using.
But unless you live off the beaten path that might be impossible. Also, 5Ghz signals do not travel far so you’re not going to experience channel conflict with the higher frequency.
If everyone living around you is bunching up on channels 1,2 and 3 for example, the interference and signal degradation will be significant.
If this is happening, you can try to force your access point to broadcast your Wi-Fi signal on channel 8 or higher. Basically, you want your network to use a channel as far away from everyone else as possible.
To do this you need to find out what channels everyone else is using and you then need to be able to tell your access point to switch its preferred channel.
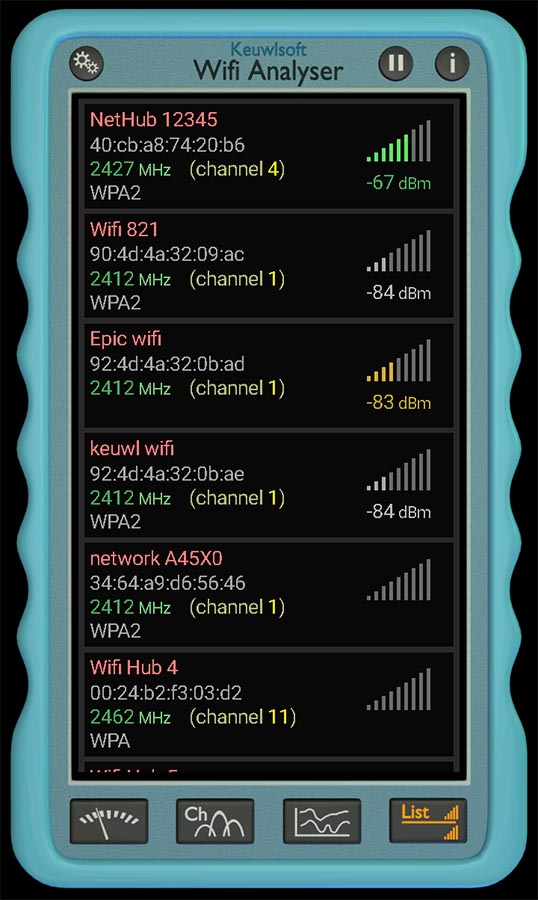
To find out what channels are being used by your access point and the access points around you, you can use a free Android app called Wi-Fi Analyzer. Just download it, run it, and tap on the ch tab. You will see a colorful graph of the channels each access point is broadcasting on.
The idea is to find the channels that are congested and the ones that are relatively free. At this point you will notice that channels overlap. For example, channel 2 overlaps heavily with channels 1 and 3. Thus, if you are on channel 2, moving your signal to 1 or 3 is not going to help much. But moving your Wi-Fi signal to channel 11 might make a big difference.
Once you have detected which channels are congested and have an idea which channel you want to move your signal to, you will have to log on to your gateway. To do this you first have to find out the address of the gateway and then the username and password.
Helpfully, these days, our ISPs have little printed stickers affixed to the gateways that tell you what username and password you need to use.
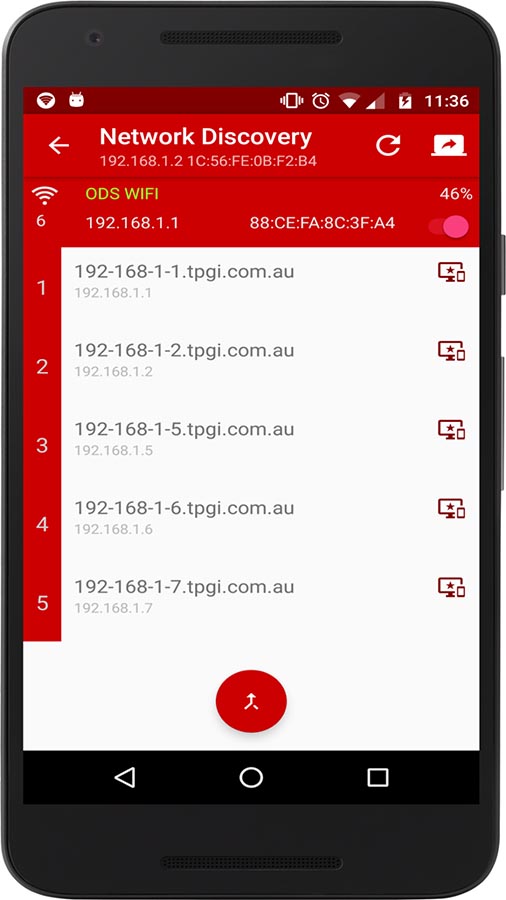
To find out the address of your gateway you will have to scan your network with an app like Net Analyzer. This app is available in the Play and App stores. Download and install it, tap on the LAN button and then press scan.
Net Analyzer will then generate a list of all the devices on your network. The first item is going to be your gateway and 90 percent of the time the gateway is going to be where your wireless signal is generated and broadcast.
To log on to your gateway, open your favorite browser and type in http:// and its IP address in their area where you normally type web site names. What you type will look like http://192.168.0.1 or http://192.168.1.1 depending on how your ISP has configured your gateway.
All modems have different user interfaces, and we can’t go through them all. But in general, you are looking for the Wireless or Wireless Lan tab (sometimes called WLAN).
Once you click there you should see the ID of your Wi-Fi signal (called the SSID) and near the name of the SSID you should see an entry for channel. It might say auto which means the access point switches channels automatically to avoid congestion.
After you have located it just change it to a channel that you know is less congested from your Wi-Fi Analyzer scan. Then click save. Your Wi-Fi will now switch channels and hopefully your signal will improve.
If you move your access point to the center of the house and find a lightly congested channel you can see big improvements without spending much money. Unfortunately, in some neighborhoods all the channels are congested so you may need to experiment to see what works best for you. Sometimes leaving it on auto is the best bet.
This where we run out of low hanging fruit. Get ready to start spending.
Spending level $
Get a range extender. These are little devices that you plug in elsewhere in your house that promise to boost the WiFi signal transmitted by your gateway so it can make it the last 20 feet to your bedroom. They are a waste of time. Do not buy.
Spending level $$
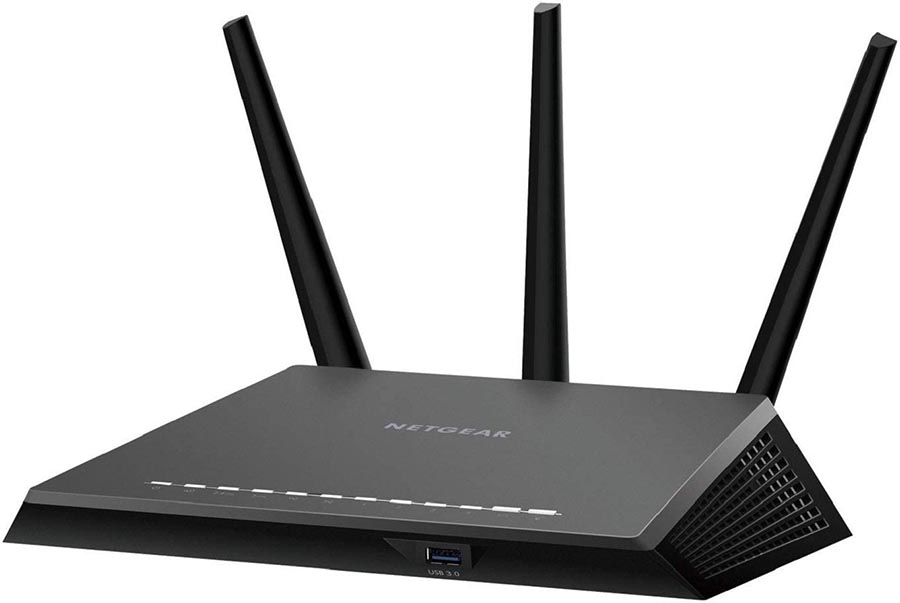
The access point that comes built into your ISPs gateway might be slow and underpowered. If that’s the case, you need to buy a new access point. These can run from US$50 all the way up to US$350. Router access points like the Netgear Nighthawk are extremely powerful but do not come cheap. Be prepared to spend US $300 and up before duties and taxes.
Spending level $$$
If you live in a multistory house or a single-story house with more than 3,000 square feet of living space, a single Wi-Fi access point isn’t going to work for you. The signal will not be able to strongly penetrate every corner of the house, no matter how powerful the access point.
So if this is a problem you have you may need to consider a hybrid wired/ wireless network where you set up access points on each floor or in each wing of the house (nice problem to have) and then discreetly run ethernet cables back to the modem/router.
This is a very solid solution, but we must deal with those wires again. But some clever routing behind bookshelves and curtains can hide them. The Ubiquity and TP-Link series of access points are both solid but can cost between $75 and $200 each. Again, before import duties and taxes.
Another solution is to install a mesh network where you get multiple access points that wirelessly connect to each other and to the main node that is plugged into the gateway.
These nodes form a signal mesh, supporting each other allowing you to place small wired access point nodes all over the house. So you get a good signal without the wires. Most home networking manufacturers like Netgear, TP-Link, Linksys, etc. make mesh networks kits that sell in the US $200 to $400 range.
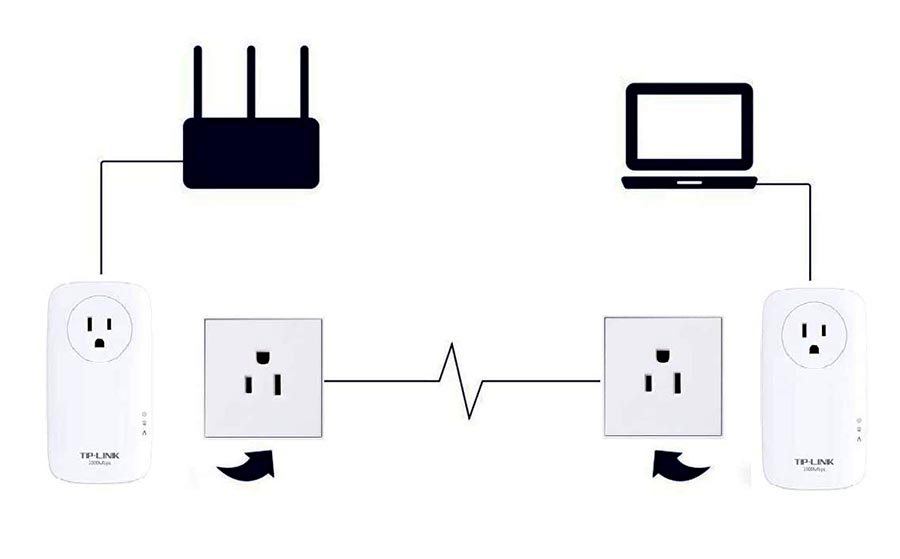
Finally, a variation on the mesh network theme is also based on multiple small access points that connect to each other using Powerline technology to connect to the modem.
Powerline allows you to send data over the electrical circuits in your house. Providing you do not have more than one electrical distribution panel and your wiring has been properly done, this solution can work well and solves the problem of having to run cables between the access points and the gateway.
My preferred solution and the one I use is to use a three inexpensive TP-Link EAP 225 access points ($65 ~$75 at Amazon) connected to my gateway via a combination of Ethernet cable and Power line adapters. This setup lets me place 5Ghz access points (fast, but short range) throughout the house and link them to back to the gateway. So high speeds, without too many wires. To manage cash flow, this approach evolved over several years – I added a single access point each year.
Final words
This is an overview of the approaches you can take to improve your in-home network. For brevity, it omits quite a bit of information but hopefully includes enough to set you on the right path. Each house is different, each house has different levels of interference and the equipment you have access to is also different.
A single article that tied to cover everything would end up being as long as a undergraduate networking textbook. And even that might not be enough.
Final Final words
You may recall that I noted that your internet experience depends on the Internet provided by your ISP as well as the quality of your in-home network.
Well, we also need to have a serious talk about your ISP. Because all the tuning of your home network won’t help if you can only get poor speeds from your Internet provider.
About the author

Simon Fraser’s work experience includes sales and marketing at ICL (now known as Fujitsu-Transaction Systems) in Trinidad and the wider Caribbean. He qualified for ICL’s ATLAS sales achievement award in 1992 and 1993.
After a brief stint consulting, Simon joined the Tourism and Industrial Development Corporation (TIDCO) where he was responsible for the information systems and services. At TIDCO he led the team that launched the first domestically hosted web site, tidco.co.tt.
In 1998 he moved on to serve as the general manager of the ISP Group, a consortium of three internet service providers in Trinidad. Currently, Mr. Fraser is a lecturer in information systems, eCommerce and information security at The University of the West Indies in Trinidad and Tobago. He has published on electronic commerce, online learning and information security.

