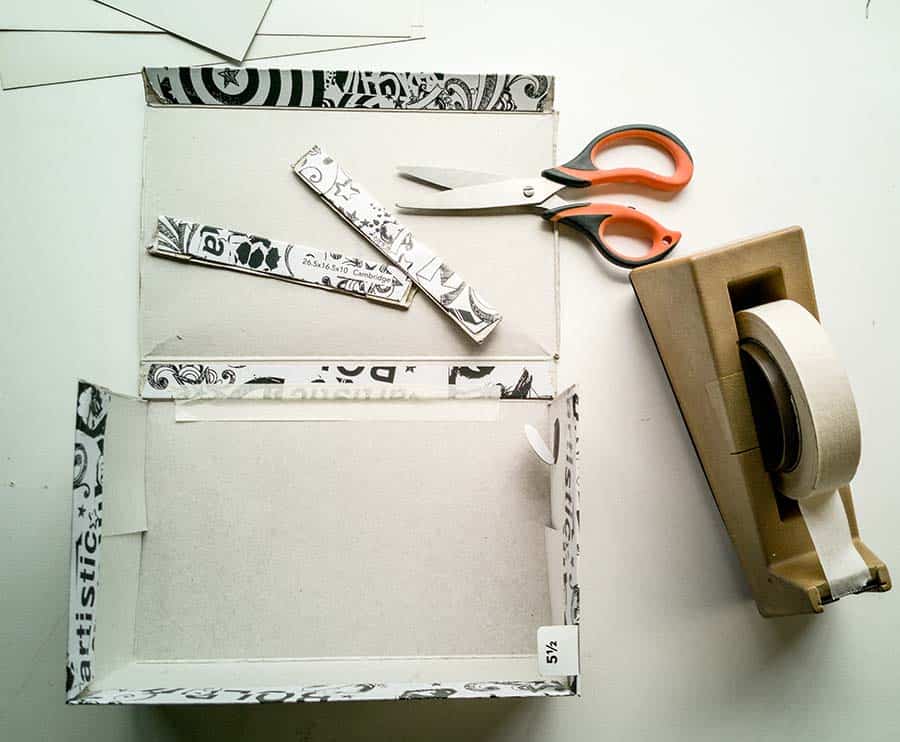
Photographs by Mark Lyndersay. Click on any image to enlarge.
Updated on October 07, 2021 with some hardwon knowledge after copying and uploading 200 separate files for teacher inspection over the course of the last month and a half.
Additions include more notes on file handling in SnapSeed for export or transfer to an LMS and additional guidance and illustrations that may help in the construction of a copybox. Please note that while the copybox is big and a bit unweildy when assembled, it can be constructed so that if folds down after use to be tucked away until it’s required.
The shoebox is a guide for your construction efforts, but any functional construct that creates the copybox environment with white card should work fine. I continue to hope this helps someone navigate this aspect of remote schoolwork.
Most online learning management systems (LMS) have an option to upload images. Much of the time that gets used to upload a picture of work done for correction.
Most of the examples that I’ve seen that are sent to teachers are borderline illegible and that’s understandable, because copying artwork is a very specific photographic skill and to be honest, it isn’t easy to do.
Copywork, or reprographics, requires pure light evenly distributed across the surface of the artwork being copied. Exposure is critical and people who do this work professionally will lay down a colour and tone balance reference alongside the art being copied.
The best way to do it is to put the art down on a scanner. There are good scanners available that will do a fine job, but you’re going to have to learn how to use one first if you haven’t used one before.
Now that I’ve established just how hard this can be do do properly, let’s explore how to do it right on a budget with minimal hassle.
Some of us have to do this a lot and the “art” is sometimes faint handwriting in pencil.
So read on, and let’s give the teachers an ease up.
Most folks will have a window with sunlight available or a desk lamp that can be used to provide light.
How do we make use of these light sources to copy schoolwork efficiently using a smartphone camera?
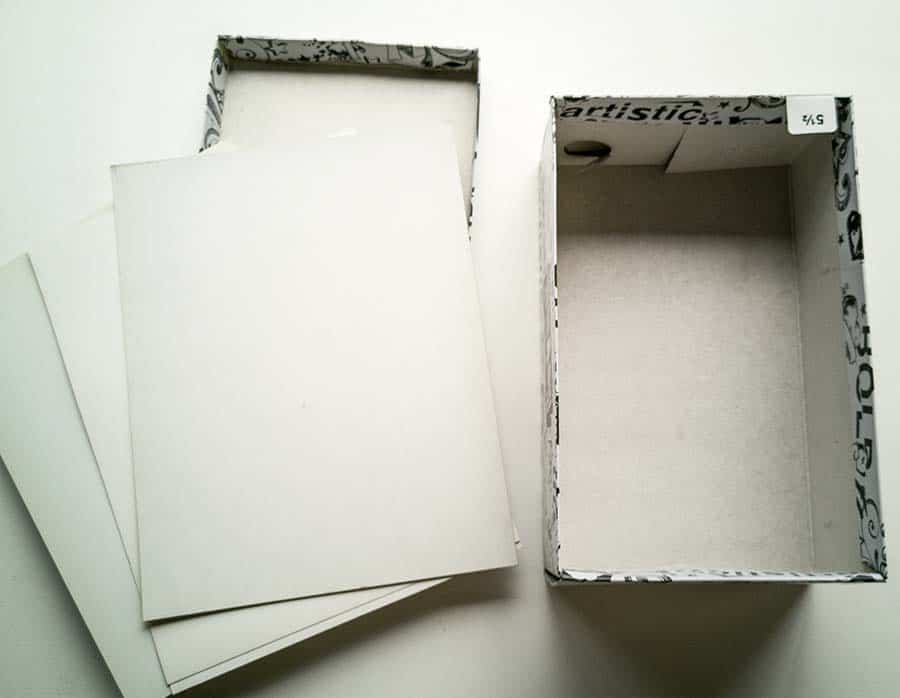
In my example, I’m going to use a shoebox and some white cards, which you can cut from construction paper.
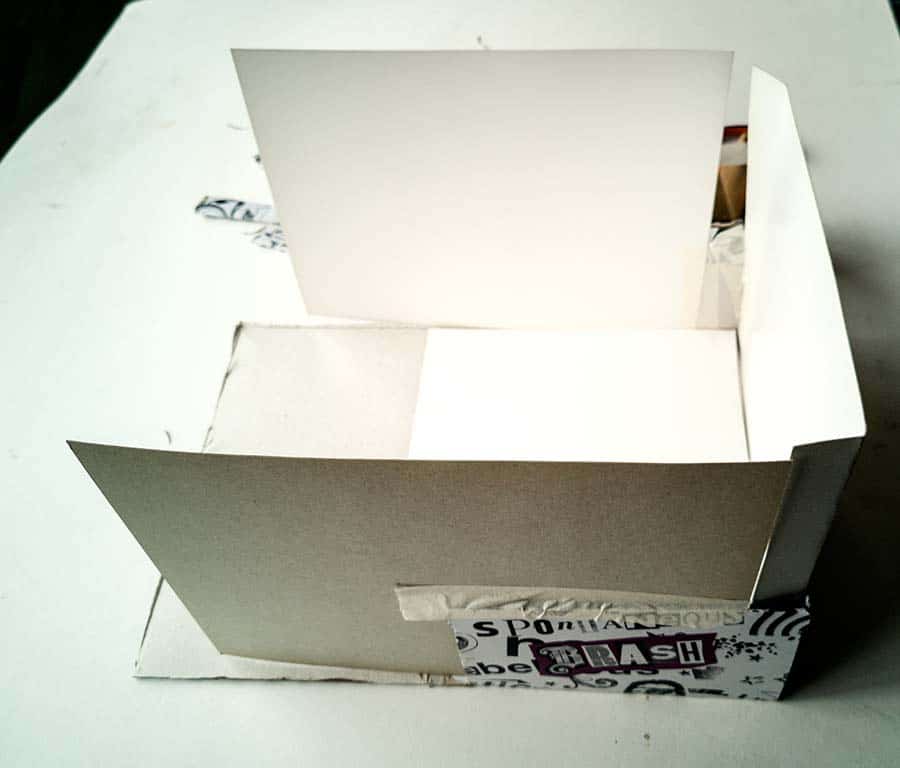
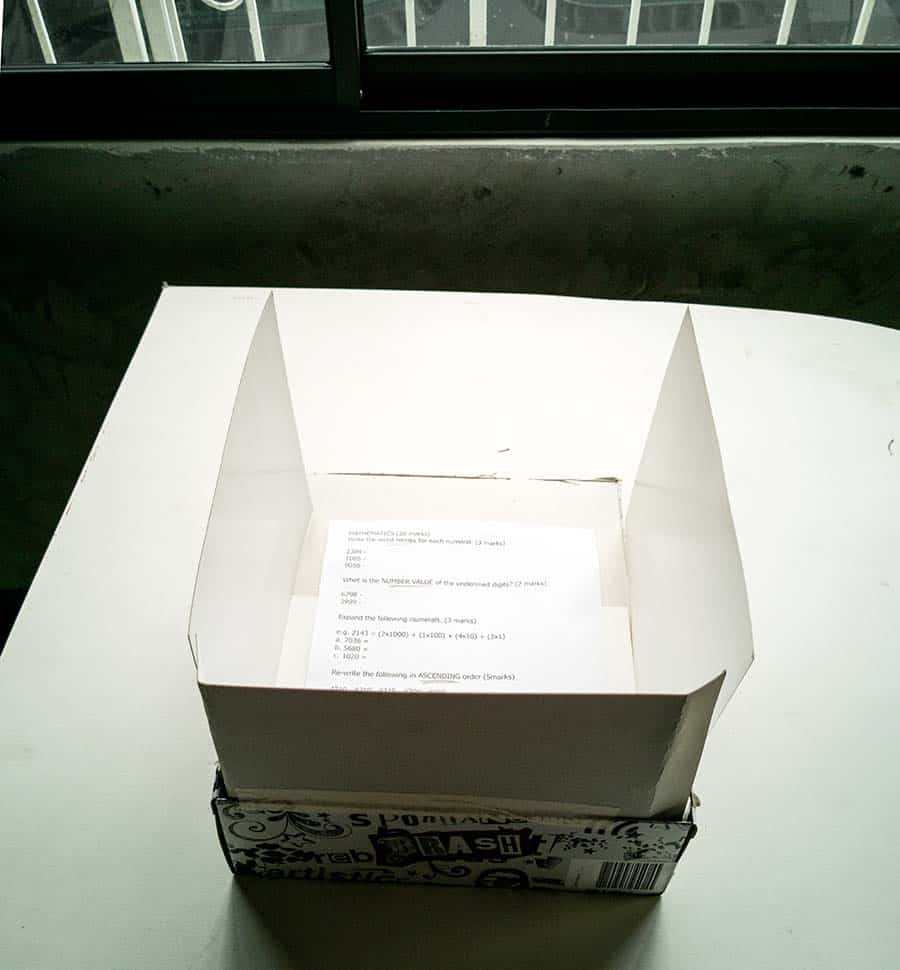
Now I will add the white cards to three sides of the shoebox. These cards, ideally six to eight inches high, will return light from the primary light source.
Here it’s indirect sunlight from a nearby window, and the cards even out the spread of light across the surface of the art.
Here’s the assembled copy box with the art in place. It’s important to capture the art from directly above with the smartphone camera held as level as you can manage. It’s best to capture a bit more image than you need and then crop it afterward.
Update, October07, 2021. One of the assumptions I made in this post was that the copying would be done during the day, with window light available. Hard practice this term makes it clearer that copying and uploading schoolwork is more likely to be done at night, when there’s no sunlight available from a nearby window.
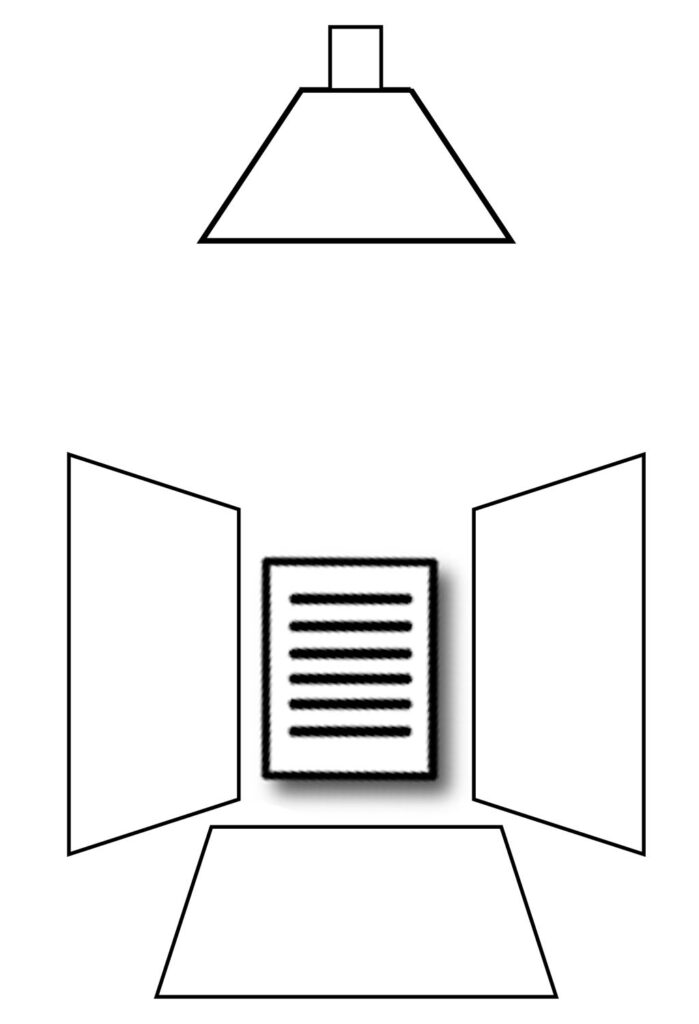
The principles remain the same if you use a desk lamp, but it’s best to back the lamp off a bit to allow the light to hit all three of the cards in order to to even out the light on the document. Resist the temptation to point the light downward. It’s better to let it skim over the surface of the document rather than light it directly as per the illustration below. A bit of experimentation will be necessary to find the right mix of light to copybox distance.
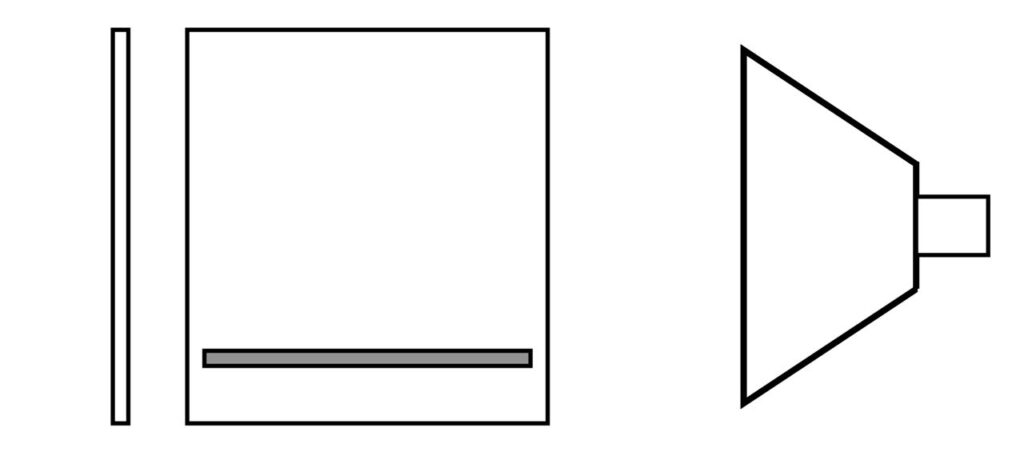
Even with all this work, we won’t get a perfectly even light spread across the surface of the art, but it will give us a good base to work from when we open the picture in an image editor.
Yes folks, we’re going to do some picture adjustments! Fear not though, this is going to be a lot easier than you might expect.
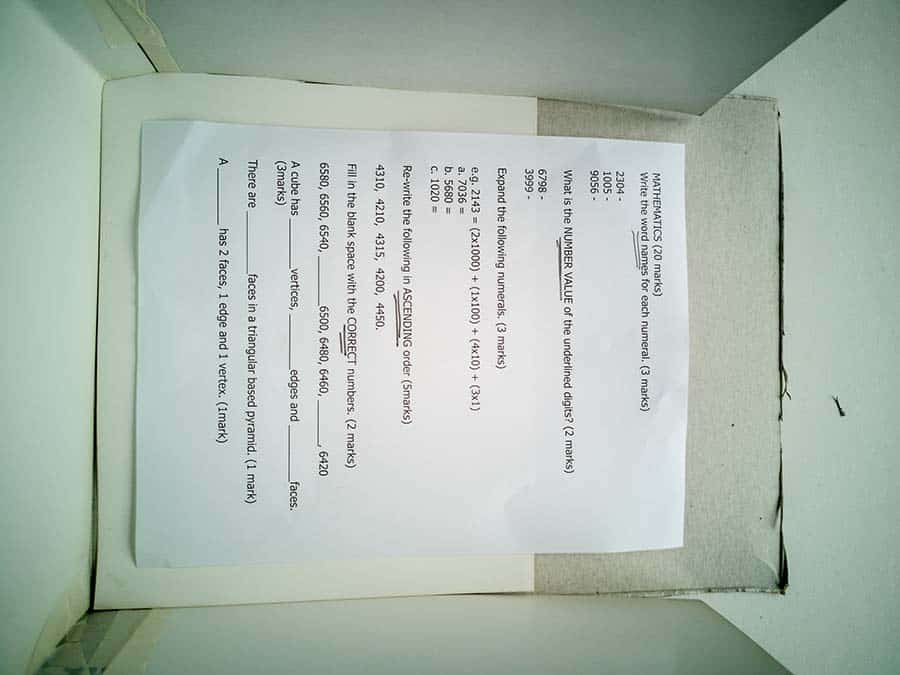
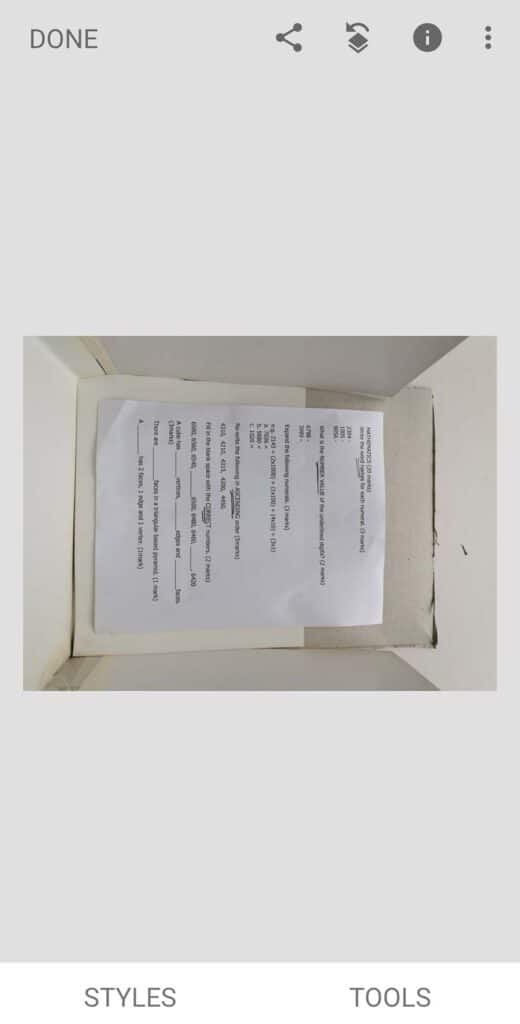
The base image here is pretty good, but for the convenience of anyone who needs to read it, we need to, at least, rotate and crop it. The software here is Snapseed (free, iOS, Android). Ignore Styles and click on Tools to get a whole range of adjustment options.
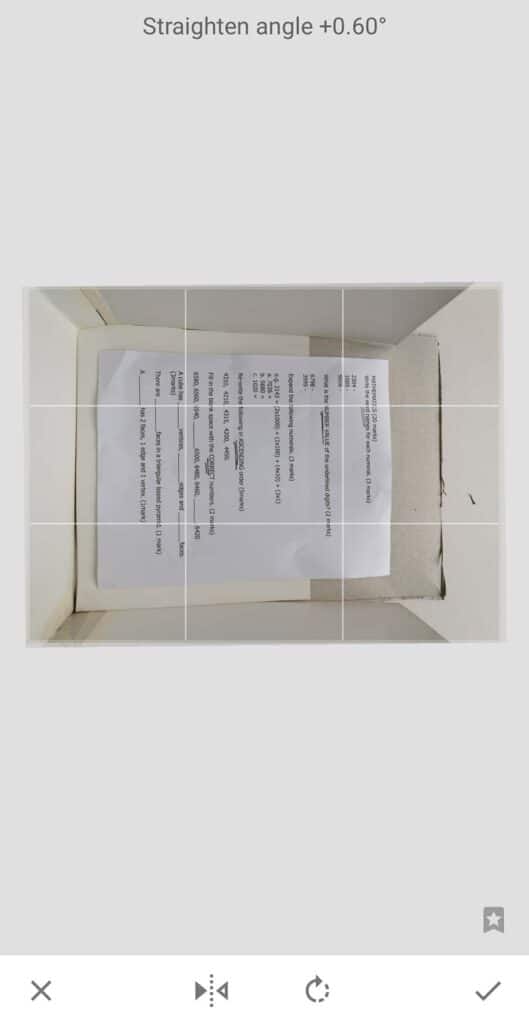
First, select Rotate to bring the image to vertical. Each click of the circular arrow will rotate the image by 90 degrees.
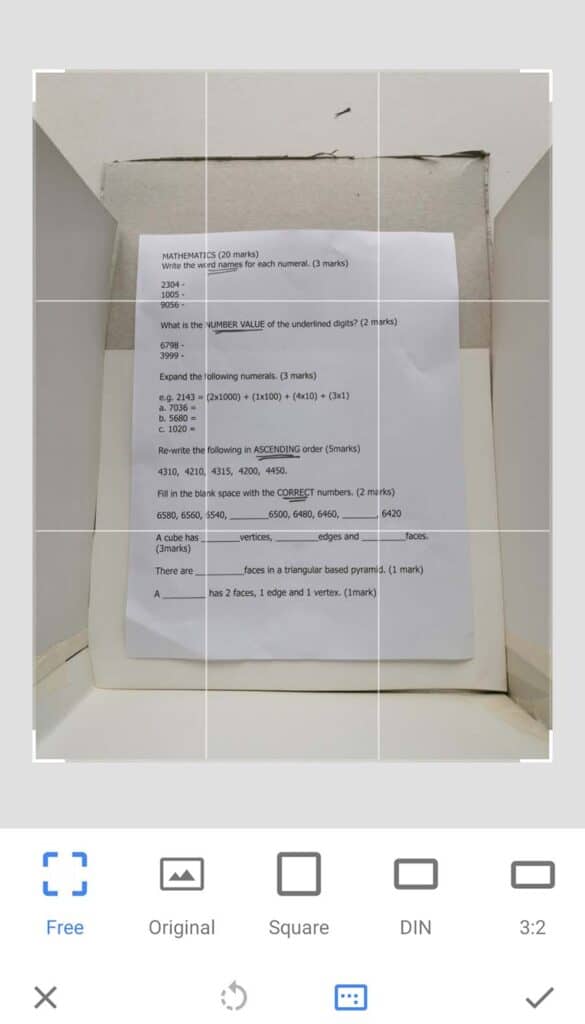
Then choose Crop and adjust the bounding box to eliminate everything except the art.
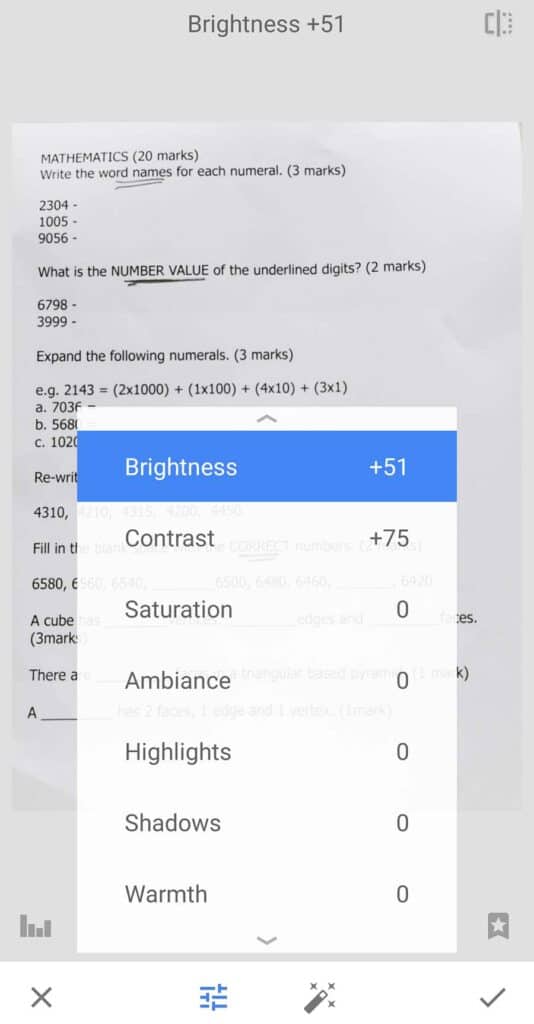
Because I’m kind of obsessive about image quality, I’ll use Tune Image to increase brightness and contrast. In the settings menu (the three vertical dots at the top right of the app, under Export and Sharing, set image sizing to 2000px, and set JPEG quality to 80 percent, currently the lowest it will go (I prefer 50 percent when editing on the desktop) that will export the image at 2000 pixels on the longest side and compress the image so it is smaller and easier to transmit.
On Android, select the share icon, the three connected dots that face left, to send the image to the LMS or to email, if that’s how you connect with the teacher. Alternatively, click on EXPORT on the main screen and select share to send the document to the app you will use to upload it.
Some LMS apps prefer to read the file off the device directly, so rename and save it so it can be found later. I’ve found it useful to use the child’s initials, the date of upload and for a series, a sequential number for that day’s uploads.
Teachers can use these final steps in Snapseed to brighten muddy images sent for marking if the art is really difficult to read.
If you get images that look like that consistently, send the link to this guide to help improve the parent’s image capture process and make your life a bit easier.
